Here’s a tutorial? Explainer? On how I got this crunchy halftone texture in Krita, using the tools that come default with the software. The short version: All I did was convert a texture heavy, shaded layer into halftones via Krita’s built-in halftone filter. The longer, more detailed version:
Steps
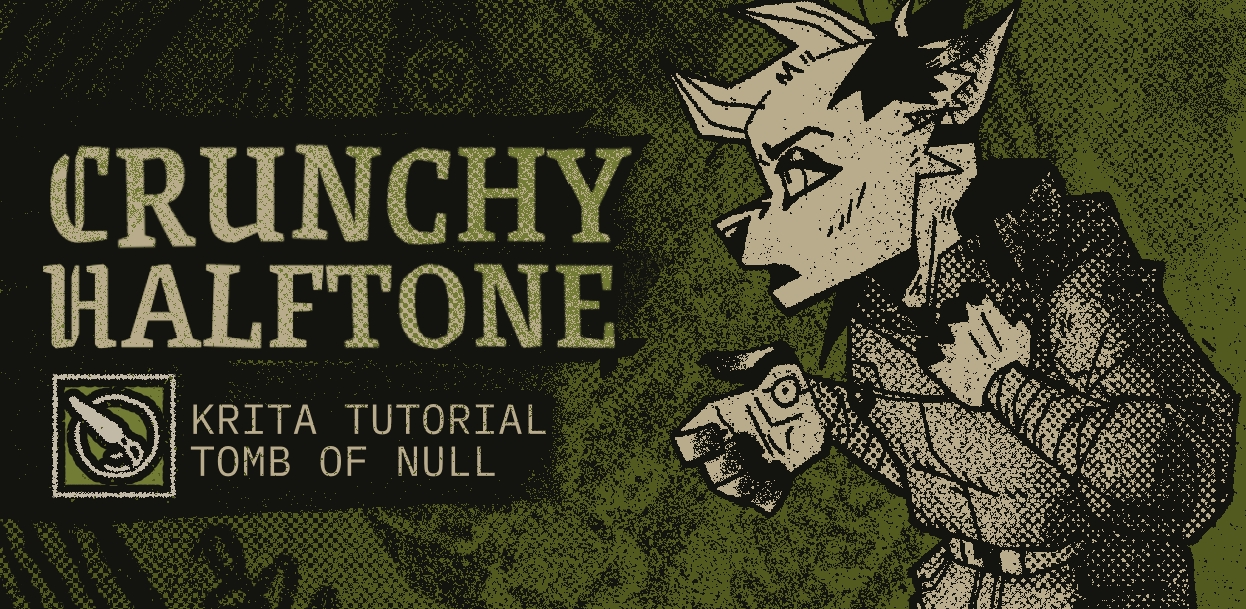
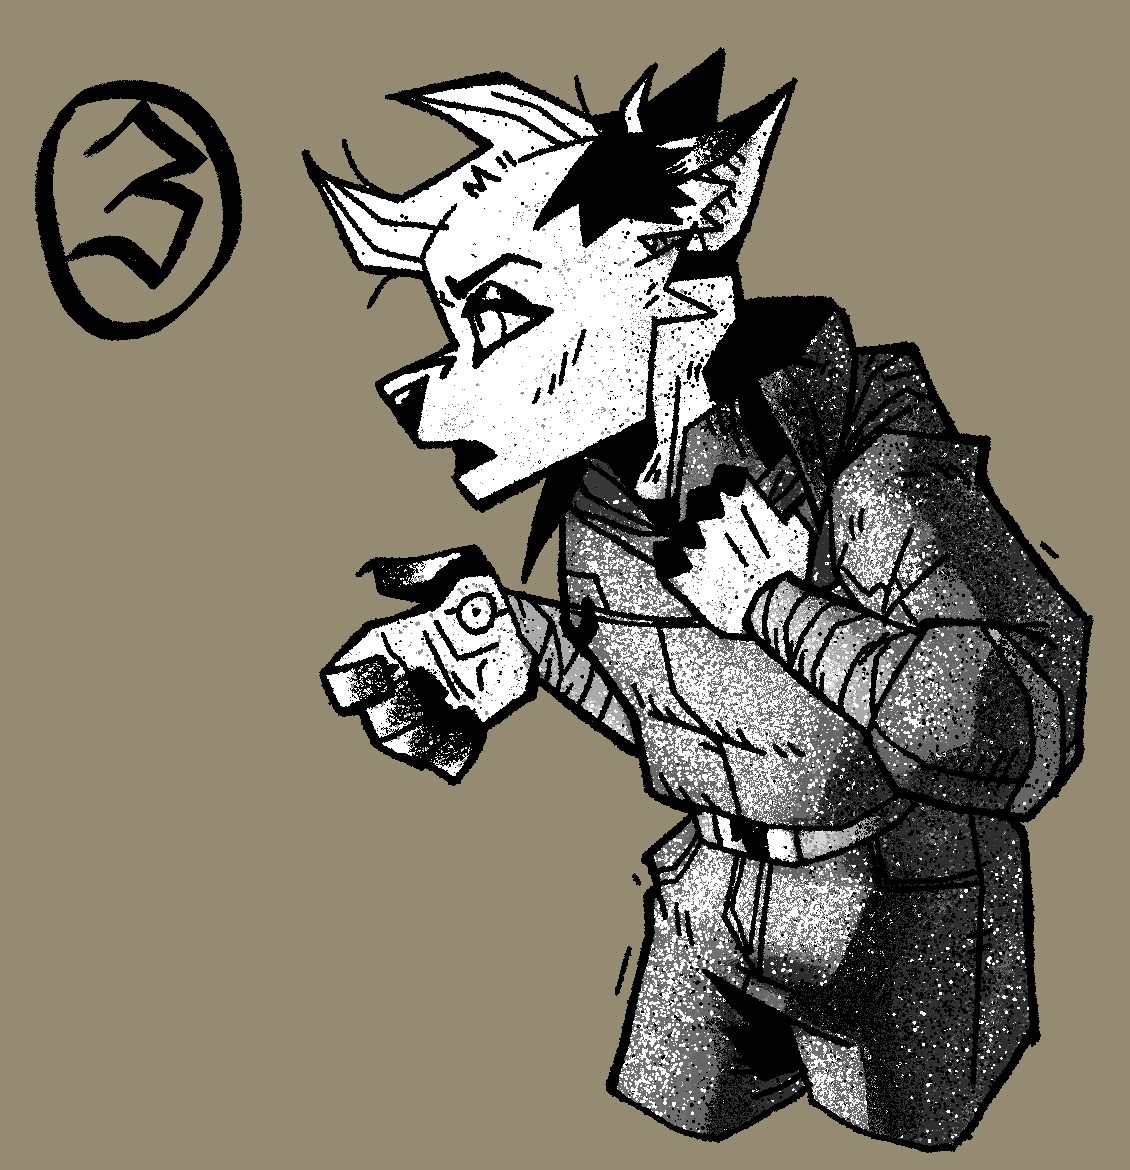
1. Set Up Your Base Layer
Here, I’ve just set up my linework and the base layer that I’ll be applying the halftone filter onto into two separate layers. For the base layer, I’ve locked the alpha/transparency so that the next step will be easier to execute.
Notes:
- For this example, I am working at 300dpi on a 3500 x 2500px sized canvas, though the illustration here is only about ~500 x 600px. I avoid anti-aisling and use blending modes that sharpen the hell out of brushes. If you find that your brushes or halftones look too pixelated, you might need to bump up your DPI, especially if you are used to working at 72dpi.
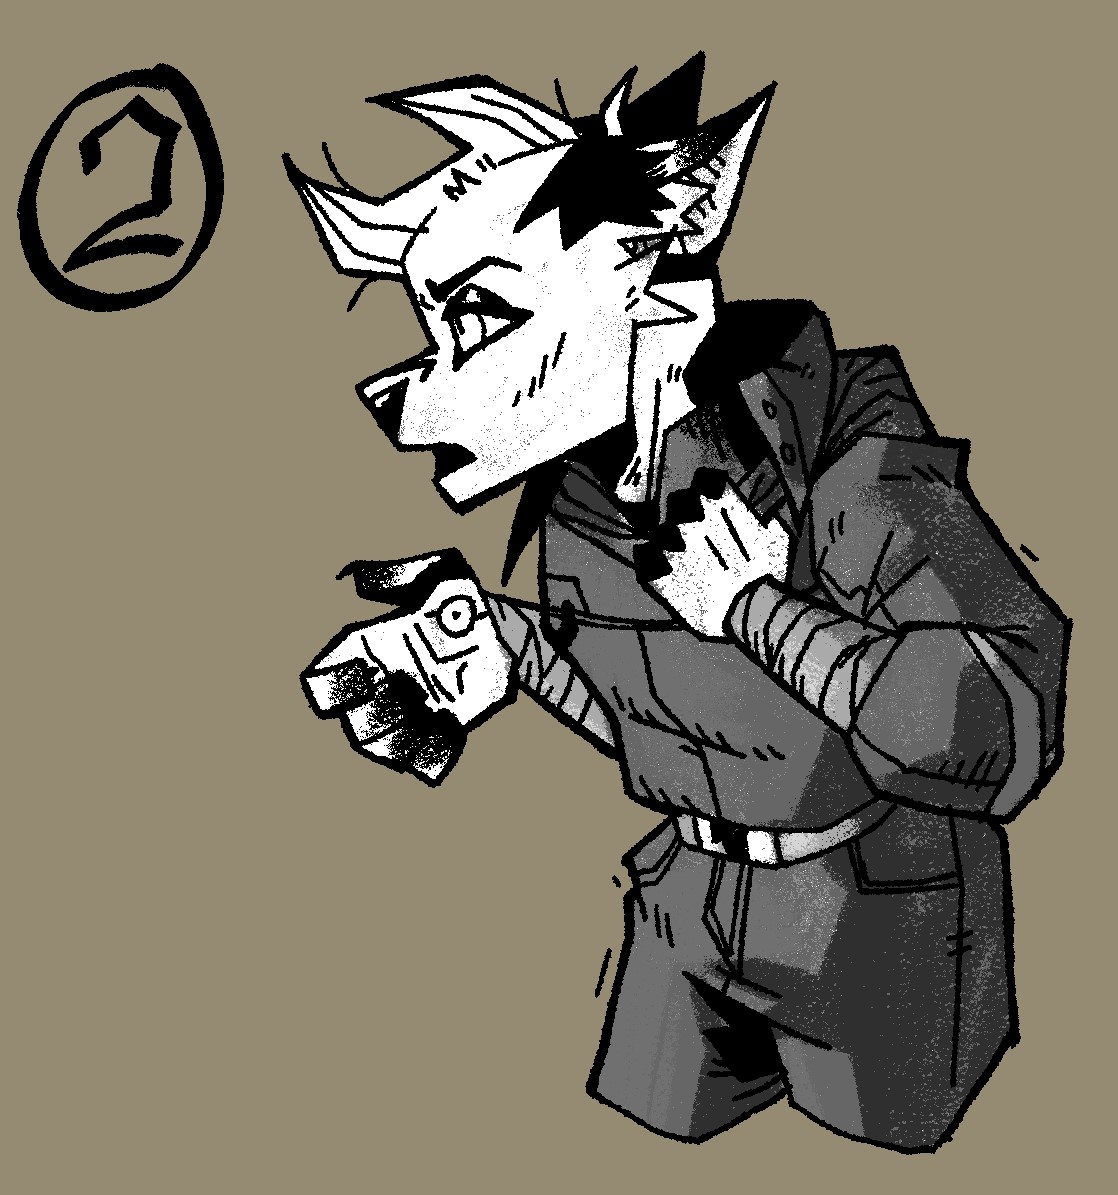
2. Paint Your Values
On that base layer, I paint my values. That is, I paint where I want the halftones to be lighter and where I’d want my halftones to be darker.
I try to stick to using black, white, and shades of grey as I find it easier to gauge how the halftones will turn out with a greyscale/black-and-white color palette over a full color palette. Generally, the lighter the value, the less dense the halftones will be in that area. The the reverse for a darker value.
To ensure I get that Crunch, I stick to using brush presets that feature a lot of fine but coarse texture. In this example, I used the following brush presets that come default in Krita, along with some small tweaks to fine-tune them to achieve the effect I’m looking for:
h) Chalk Details [Found under the Sketch tag]
In the Brush Editor:
- Set Blending Mode to Dissolve [Found under the Misc group]
- Set Painting Mode to Build-Up
h) Chalk Grainy [Found under the Sketch tag]
In the Brush Editor:
- Set Blending Mode to Dissolve [Found under the Misc group]
- Set Painting Mode to Build-Up
Notes:
- Try to make sure there is enough contrast between your dark and light areas. This is something that can be tweaked later, but similar values tend to get lost when they are converted to halftones. Or alternatively, things can end up difficult to “read” once converted to halftones. We want some grime and chaos, but not so much that we can’t tell what we are looking at or loose important details to a halftone soup.
- In this example, when it comes to shading and highlighting, I mostly stuck with midtones and shadows as I felt the highlights that’ll be added in the next step will make up for that. There isn’t really a clear-cut science on how to know when to do this and when not to, so I mostly just go off vibes and trial-and-error till I get something that looks right to me. Yay art!
3. Apply Extra Grit
At this step, I use a texture spray brush to loosely highlight my lighter areas and darken my darker areas using primarily black or white [and a very minimal amount of grey]. I welcome having some white over-spray into the dark areas and vis versa as I find it provides some extra visual interest? Contrast? Pizazz? Keeps things from looking too tidy. Tidy is the opposite of what we want to do here.
In this example, I used the following brush presets with these modifications:
y) Texture Starfield [Under the FX and Texture Tag]
In the Brush Editor:
- Brush Tip > Set Mask Type to Soft > Edit the Softness Curve so that the first point is in the top left corner, and the second point in the top right corner, forming a straight, horizontal line that bumps up against the very top of the curve chart. This removes the softness of the brush tip.
- Brush Tip > Adjust Diameter to your liking. In this example, I’ve set it to about 4px.
- Set Blending Mode to Dissolve [Found under the Misc group].
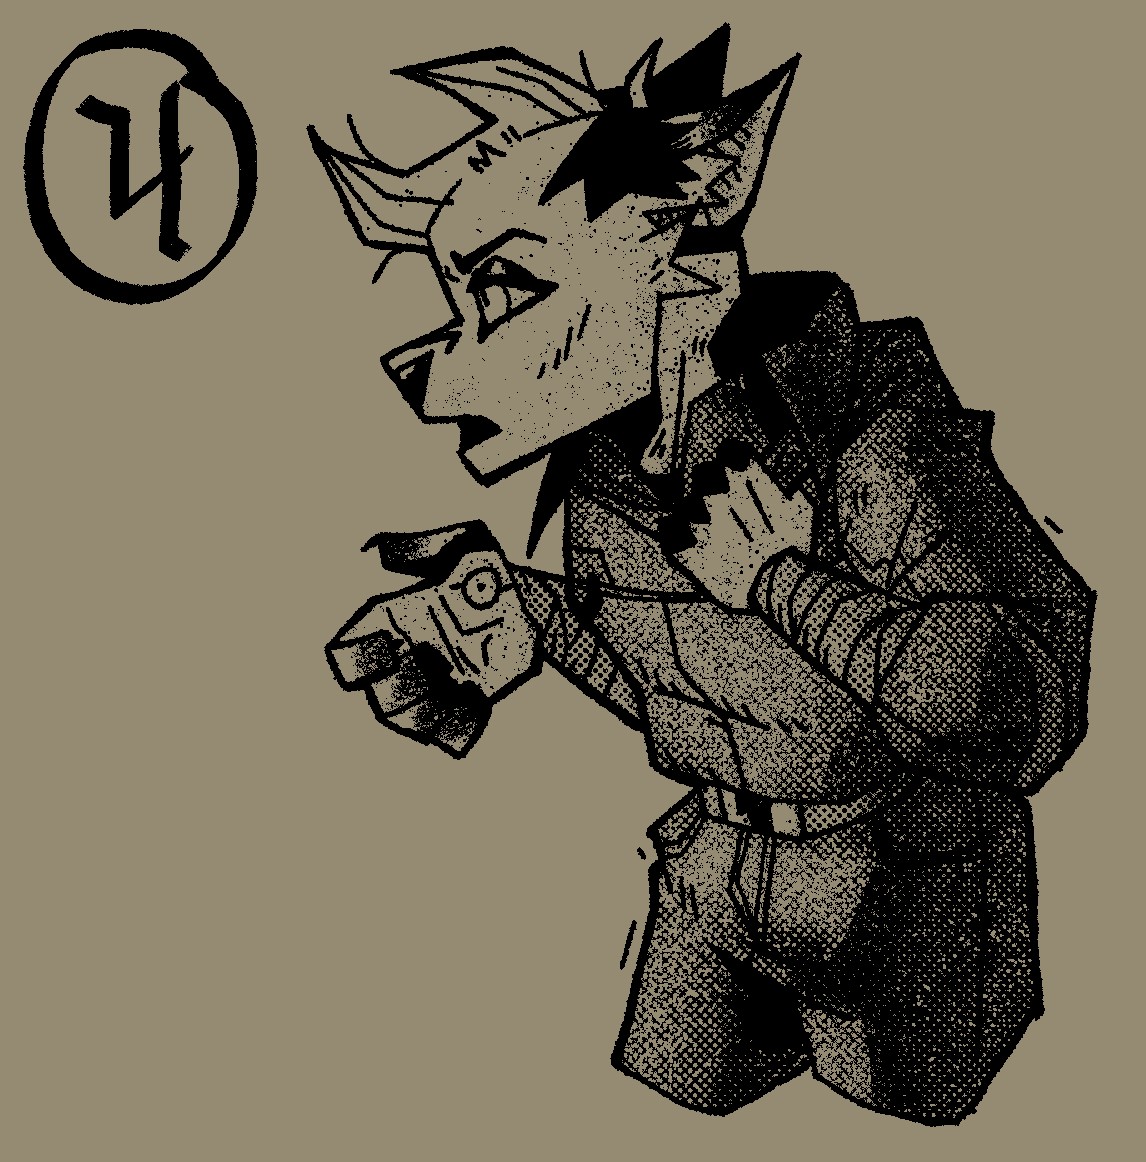
4. Convert to Halftones
Finally, I head over to the Menu Bar and select Filter > Artistic > Halftones to open up the options for that filter. There’s a lot of settings-fiddling at this step. Here’s what I did for this example:
- Screen Generator tab > Transform tab > Adjust the Frequency to your liking. This impacts the size/density of the dots that make up the halftone.
- Screen Generator tab > Postprocessing tab [NOTE: This is NOT the same as the Postprocessing tab that is next to the Screen Generator tab. Here I am referring to the one next to the Transform tab under the Screen Generator tab. Confusing, I know lol] > Play with the Brightness and Contrast to your liking.
- Postprocessing tab [the one next to the Screen Generator tab this time] > Set Background to 0% Opacity.
Once things look good to you, hit Ok. Alternatively, you can hit Create Filter Mask instead if you need more flexibility or would like to be able to toggle the halftone filter visibility on or off as needed.
Notes:
- There are a LOT of cool features to play around with in this filter. I know some of us hate reading manuals, but consider checking out the krita manual’s section on this filter for more info.
- In this example, when it comes to shading and highlighting, I mostly stuck with midtones and shadows as I felt the highlights that’ll be added in the next step will make up for that. There isn’t really a clear-cut science on how to know when to do this and when not to, so I mostly just go off vibes and trial-and-error till I get something that looks right to me.
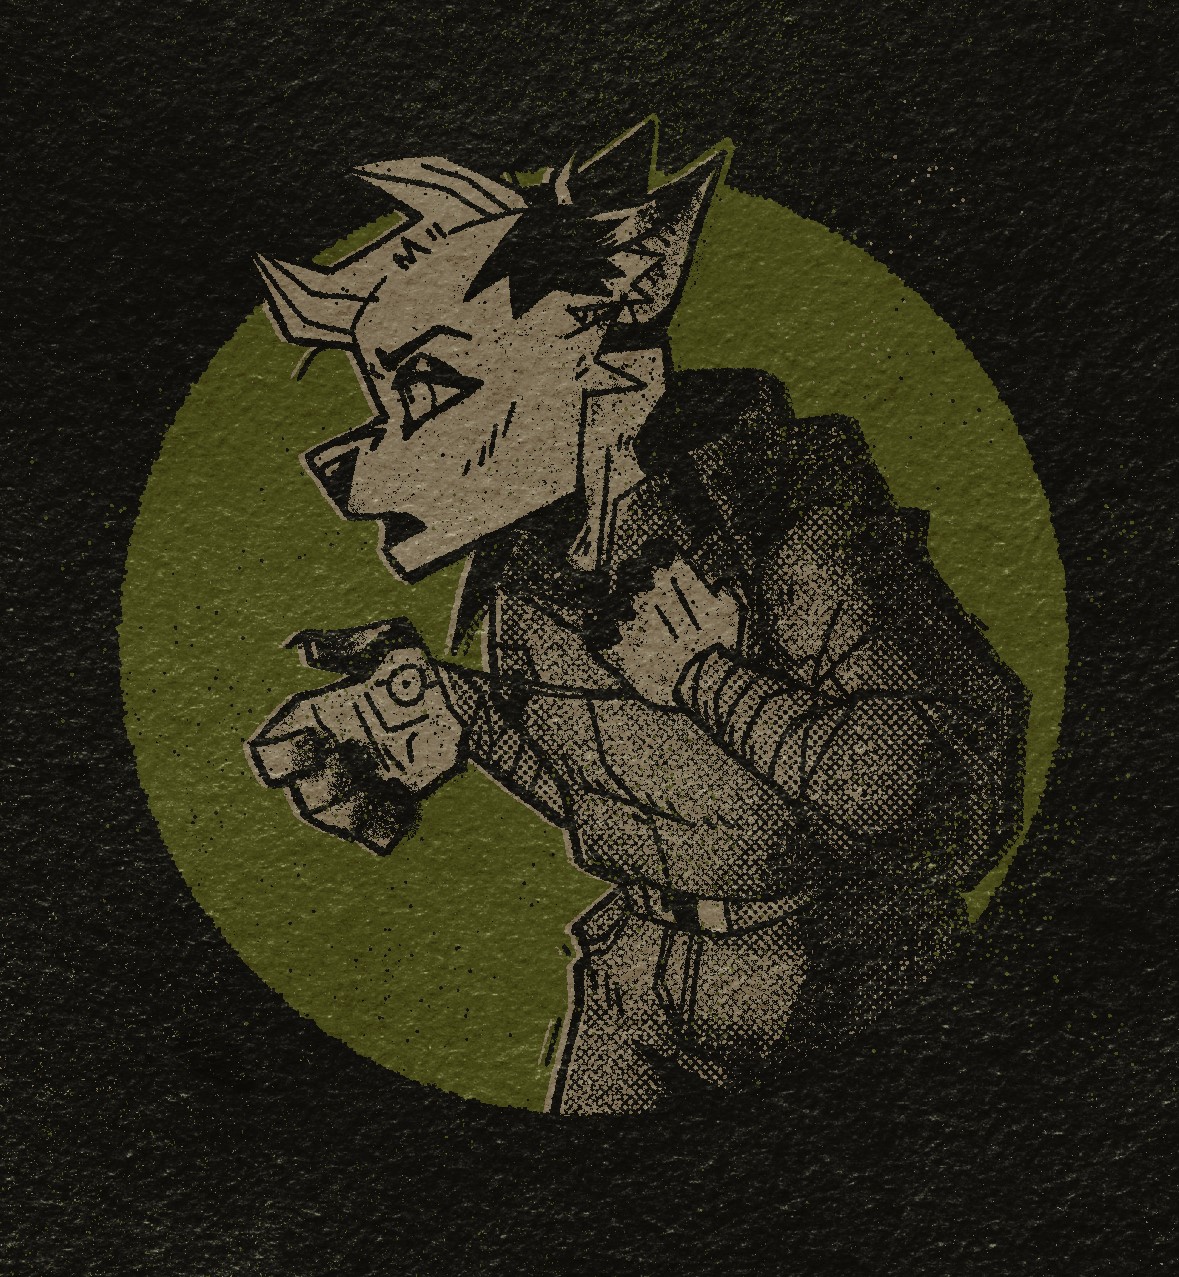
From here you can add texture overlays, add color underneath the halftone layer, scoot and scale up the halftone layer by a smidge to create a neat offset effect, so on.
Need textures and brush presets? I got several [for free!] over here:
And if you found this nifty and want to help me out, you can send a couple of bucks to my Tip Jar. ‘Helps me afford to keep making things. :D
Listening to: why america is addicted to cars | Answer in Progress
Reading: Krita Manual
Phase: Waxing Gibbous
Weather: Clear and Crispy